Ingredients
– 3 very ripe medium/large bananas
– ½ cup (8 tablespoons) unsalted butter at room temperature
– ¾ cup sugar (or honey as a substitution)
– 2 large eggs lightly beaten
– 1 ½ cups all-purpose flour
– 1 teaspoon baking soda
– ½ teaspoon salt
– ½ teaspoon vanilla extract
– 1 cup chopped toasted walnuts (optional)
– ½ cup raisins (optional)
Instructions
1-First Step: Preparation and Mise en Place Begin by preheating your oven to 350°F. This temperature is ideal for banana bread, allowing it to rise steadily without burning the outside before the inside is cooked. While the oven heats, prepare your loaf pan. The ideal size is 9.25 inches long by 5.25 inches wide by 2.75 inches deep. Grease the pan thoroughly with butter or cooking spray, then dust it with a light coating of flour. This step ensures the bread releases easily after baking. Tap out any excess flour so you do not have white spots on your crust.
2-Second Step: Toasting the Walnuts Toasting the walnuts beforehand adds a wonderful crunch and intensifies their nutty flavor. Place the raw walnuts in a dry pan over medium heat. Stir them continuously to prevent burning. Toast them until they are fragrant and slightly golden, which usually takes just a few minutes. Remove them from the heat immediately to stop the cooking process. Let them cool completely before chopping them coarsely. If you are making a nut-free version, you can skip this step or toast seeds like pumpkin seeds instead.
3-Third Step: Creaming Butter and Sugar In a large mixing bowl, combine the softened unsalted butter and the sugar (or honey). Using a hand mixer or a sturdy wooden spoon, cream them together until the mixture is light and fluffy. This process incorporates air into the batter, which helps the bread rise. If you are using honey, the texture might be slightly denser, but the flavor will be delicious. Creaming usually takes about 2 to 3 minutes with an electric mixer.
4-Fourth Step: Adding Bananas and Eggs Peel your very ripe bananas. In a separate small bowl, mash them with a fork until they reach a chunky applesauce consistency. You want some small bits of banana remaining for texture, rather than a completely smooth puree. Add the mashed bananas to the butter and sugar mixture. Crack the two large eggs into a small bowl and lightly beat them with a fork, then add them to the batter as well. Mix everything on low speed or by hand until just blended. It is okay if the mixture looks slightly curdled or separated at this stage.
5-Fifth Step: Mixing Dry Ingredients In a separate medium bowl, whisk together the all-purpose flour, baking soda, and salt. Whisking helps distribute the baking soda evenly throughout the flour, which prevents bitter pockets in the finished bread. Sifting the flour first can also help make the bread lighter, though it is not strictly necessary if you whisk well.
6-Sixth Step: Combining Wet and Dry Ingredients Add the dry flour mixture to the wet banana mixture in two or three batches. Mix gently with a spatula or spoon after each addition. Be careful not to overmix. Stop mixing as soon as you no longer see streaks of dry flour. Overmixing develops gluten, which can make the bread tough and chewy rather than tender and soft.
7-Seventh Step: Final Touches and Baking Fold in the vanilla extract, the cooled chopped walnuts, and the raisins if you are using them. Pour the batter into your prepared loaf pan, spreading it evenly with a spatula. Place the pan in the center of the oven. Bake for 55 to 60 minutes. Start checking for doneness around the 50-minute mark. Insert a wooden toothpick into the center of the loaf. If it comes out clean or with just a few moist crumbs, the bread is done. If it comes out with wet batter on it, give it a few more minutes.
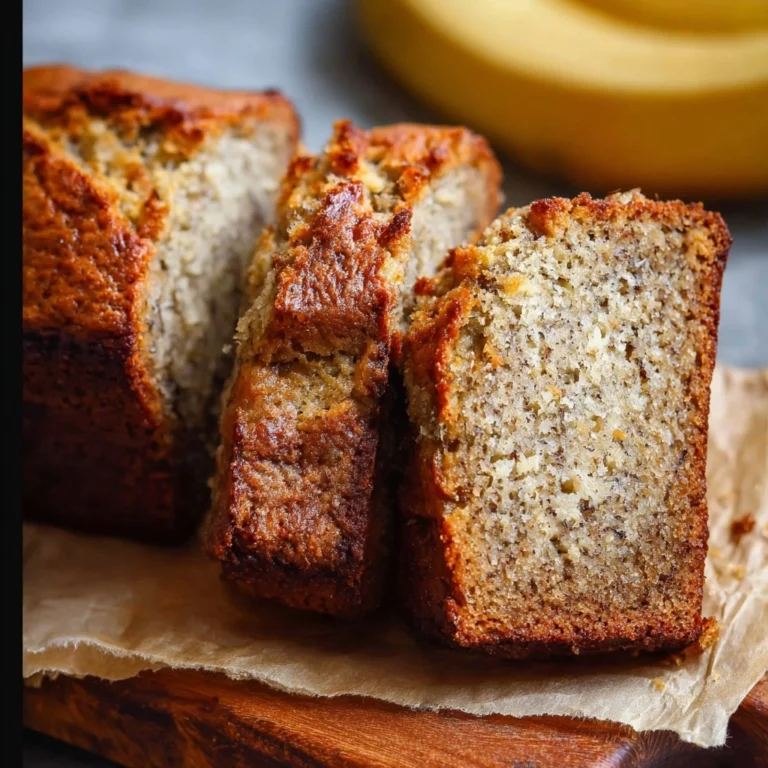
8-Eighth Step: Cooling and Serving Once baked, remove the pan from the oven and set it on a heat-safe surface. Let the bread rest in the pan for 10 minutes. This resting period allows the structure to set, making it easier to remove without breaking. After 10 minutes, carefully turn the loaf out onto a wire rack to cool completely. Waiting until it is cool before slicing helps prevent the bread from crumbling, although it is very hard to resist a warm slice!
Last Step:
Please leave a rating and comment letting us know how you liked this recipe! This helps our business to thrive and continue providing free, high-quality recipes for you.Notes
🍌 Ripen bananas faster by baking at 250°F for 15-20 min or bagging with apple.
🔥 Toast walnuts lightly for enhanced nutty flavor without bitterness.
❄️ Freeze overripe bananas peeled for up to 3 months for future baking.
- Prep Time: 10 minutes
- Cooling: 10 minutes
- Cook Time: 60 minutes
- Category: Breads
- Method: Baking
- Cuisine: American
- Diet: Vegetarian
Nutrition
- Serving Size: 1 slice
- Calories: 350 kcal
- Sugar: 20g
- Sodium: 243mg
- Fat: 18g
- Saturated Fat: 7g
- Unsaturated Fat: 10g
- Trans Fat: 0g
- Carbohydrates: 45g
- Fiber: 3g
- Protein: 5g
- Cholesterol: 57mg