Ingredients
– 3/4 cup unsalted butter for creating the brown butter base that gives these brownies their signature nutty flavor
– 3/4 cup Dutch-process cocoa powder for deep chocolate flavor and fudgy texture
– 1 teaspoon vanilla extract for warmth and enhancing the overall flavor profile
– 1 3/4 cup packed light brown sugar for keeping the center soft and crackly top
– 3 large eggs for structure and fudgy consistency
– 3/4 cup all-purpose flour for structure
– 1/2 teaspoon salt for balancing the sweetness and intensifying the chocolate flavor
– 1/2 cup semisweet or bittersweet chocolate chips or chopped chocolate (optional) for pockets of melted chocolate and extra richness
Instructions
1-First Step: Preparation and Oven Setup Before we start mixing, let’s get our baking space ready. Preheat your oven to 350°F (175°C). While the oven heats up, prepare your baking pan by greasing it thoroughly and lining it with parchment paper on all sides. This parchment paper overhang will act as handles later, making it easy to lift the brownies out of the pan once they’re cooled. Having your pan prepared before you start mixing means you won’t have to worry about the batter sitting while you scramble to get the pan ready. For this recipe, an 8×8 or 9×9 inch square pan works best. If you use a larger pan, your brownies will be thinner and may require less baking time. Conversely, a smaller pan will result in thicker brownies that might need a few extra minutes in the oven. I personally prefer using a metal pan as it conducts heat more evenly than glass, which helps achieve those perfectly chewy edges we’re after.
2-Second Step: Creating the Magic Brown Butter This is where the real magic happens! Place your unsalted butter in a small saucepan or skillet over medium-low heat. Let it melt completely, then continue cooking while stirring and scraping the bottom of the pan every 10 to 15 seconds. You’ll notice the butter start to foam and sizzle that’s completely normal! Keep a close eye on the color as it cooks. You’ll see the milk solids at the bottom start to turn golden brown, and a nutty aroma will fill your kitchen. This usually takes about 10 to 15 minutes. The key here is patience and attentiveness too high heat will burn the butter, while not cooking it long enough means you’ll miss out on that wonderful flavor. For more detailed guidance on this technique, check out this excellent brown butter tutorial. Once your butter reaches that beautiful golden brown color and releases that nutty fragrance, remove it from the heat immediately. It can go from perfect to burned in seconds, so don’t walk away! Transfer it to a heatproof bowl to stop the cooking process. For more tips on browning butter perfectly, this guide explains the chemistry behind the process.
3-Third Step: Blooming the Cocoa While your brown butter is still warm (but not scorching hot), whisk in the Dutch-process cocoa powder and vanilla extract until smooth. This technique, called “blooming” the cocoa, helps intensify the chocolate flavor and results in a more fudgy final texture. The warmth of the butter “wakes up” the cocoa compounds, releasing more flavor potential than if you were to add it to cold butter. Dutch-process cocoa powder is specifically recommended for this recipe because it has been treated with alkali to neutralize its natural acidity. This results in a darker color and a smoother, more mellow chocolate flavor that pairs perfectly with the nuttiness of brown butter. If you only have natural cocoa powder, you can still use it, but the flavor profile will be slightly brighter and more acidic.
4-Fourth Step: Whipping the Eggs and Sugar In a separate bowl, use a mixer (handheld or stand) to beat the large eggs and packed light brown sugar until light, fluffy, and pale in color. This step typically takes 3-5 minutes on medium-high speed. You’ll notice the mixture increase in volume and become ribbon-like when you lift the beaters. This process incorporates air into the batter, which helps create that beautiful crackly top on the brownies. Don’t rush this step! Properly whipping the eggs and sugar is crucial for achieving the right texture. If the mixture isn’t fluffy enough, your brownies may turn out denser than intended. The brown sugar also plays a key role here its molasses content attracts moisture, keeping the brownies wonderfully fudgy while contributing to that irresistible shiny crust.
5-Fifth Step: Combining the Mixtures Now comes the delicate part of combining our two mixtures. Gently fold the warm brown butter and cocoa mixture into the whipped eggs and sugar. Use a rubber spatula and work slowly, being careful not to deflate all the air you just incorporated into the eggs. Fold until just combined you should still see some streaks of lighter and darker batter. This gentle folding technique is essential for maintaining the airy structure we created in the previous step. Overmixing at this stage can result in tough, cakey brownies instead of the fudgy texture we’re after. Take your time and be gentle with the batter it will thank you with perfect texture!
6-Sixth Step: Adding Dry Ingredients Next, fold in the all-purpose flour and salt until no flour streaks remain. Again, be gentle with this process! We want to combine everything without overworking the gluten in the flour, which can make brownies tough. A few gentle folds should do the trick. If you’re using chocolate chips or chopped chocolate, fold them in now. This step is optional, but I highly recommend it for extra pockets of melty goodness throughout your brownies. Semisweet or bittersweet chocolate works best here as it complements the rich cocoa flavor without making the brownies overly sweet.
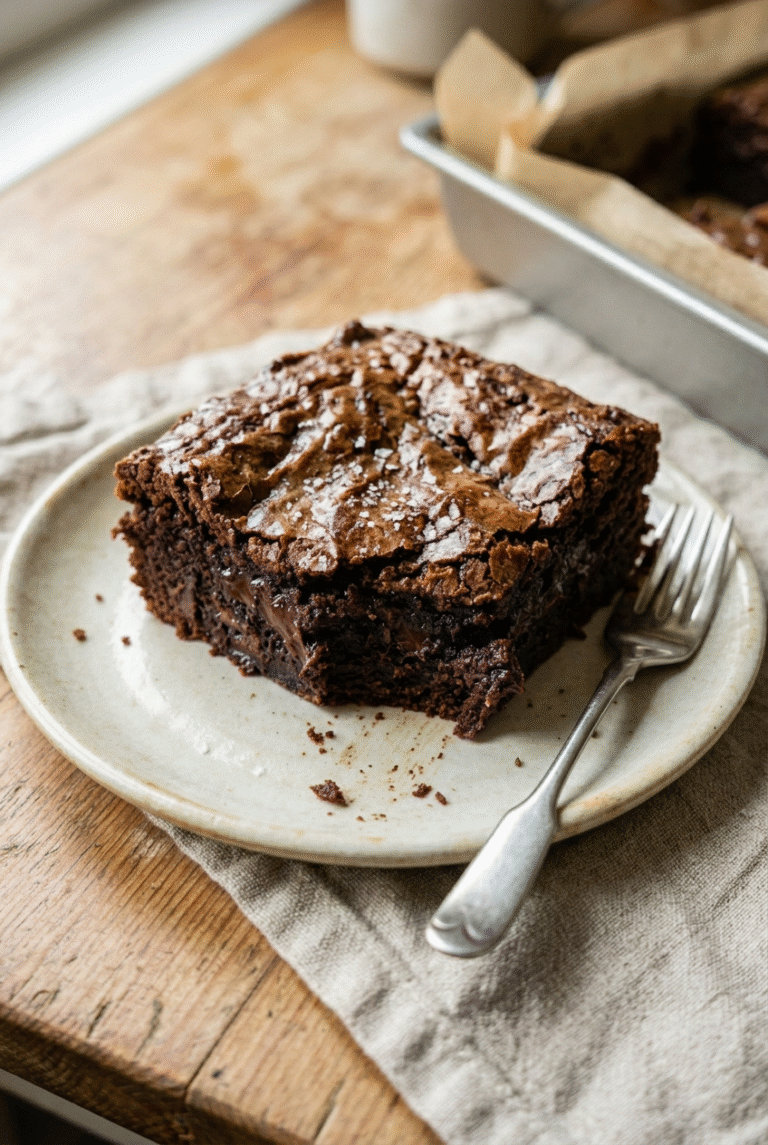
7-Final Step: Baking to Perfection Pour the batter into your prepared baking pan and spread it evenly with an offset spatula or the back of a spoon. Place the pan in the preheated oven and bake for about 25 minutes. However, start checking for doneness at the 20-minute mark, as oven temperatures can vary. To test for doneness, insert a knife or toothpick into the center of the brownies. For fudgy brownies, it should come out with some moist batter clinging to it, not completely clean. The edges should appear set and may have started to pull away slightly from the sides of the pan. Remember that brownies continue to cook as they cool, so slightly underbaking is actually desirable! Baking time can range from 25 to 35 minutes depending on your oven and the exact size of your pan. If you prefer cakey brownies, bake until a toothpick comes out mostly clean. For ultra-fudgy results, err on the side of underbaking. Once done, remove the brownies from the oven and let them cool completely in the pan before slicing. This patience is difficult but necessary cutting warm brownies can result in messy, gooey slices instead of clean squares. For the cleanest cuts, refrigerate the cooled brownies for about an hour before slicing. Use a sharp knife that you’ve run under hot water and wiped clean between each cut. This technique will give you those beautiful, bakery-perfect squares that look as good as they taste!
Last Step:
Please leave a rating and comment letting us know how you liked this recipe! This helps our business to thrive and continue providing free, high-quality recipes for you.Notes
🔥 Brown butter on low heat, stir constantly to avoid burning for perfect nutty flavor.
⏲️ Slightly underbake for fudgy centers – they set while cooling.
🍫 Bloom cocoa in warm butter for deeper chocolate taste and shine.
- Prep Time: 20 minutes
- Cook Time: 30 minutes
- Category: Dessert
- Method: Baked
- Cuisine: American
- Diet: Vegetarian
Nutrition
- Serving Size: 1 brownie
- Calories: 380 kcal
- Sugar: 35g
- Sodium: 180mg
- Fat: 20g
- Saturated Fat: 12g
- Unsaturated Fat: 7g
- Trans Fat: 0g
- Carbohydrates: 48g
- Fiber: 3g
- Protein: 5g
- Cholesterol: 95mg