Ingredients
– 3/4 cup softened butter (preferably salted) – Provides richness and helps create a tender cookie texture
– 1/2 cup granulated sugar – Sweetens the cookie and contributes to the crisp exterior
– 1/2 cup brown sugar – Adds moisture and depth of flavor with its molasses content
– 1 egg – Binds the ingredients together and adds structure to the cookie
– 1 tablespoon vanilla extract – Enhances the chocolate flavor and adds aromatic complexity
– 1 1/2 cups all-purpose flour – Forms the base structure of the cookie
– 1/2 cup cocoa powder – Provides the rich chocolate flavor and dark color
– 1 teaspoon baking soda – Helps the cookies rise and creates a lighter texture
– 1/4 teaspoon salt – Balances the sweetness and intensifies the chocolate flavor
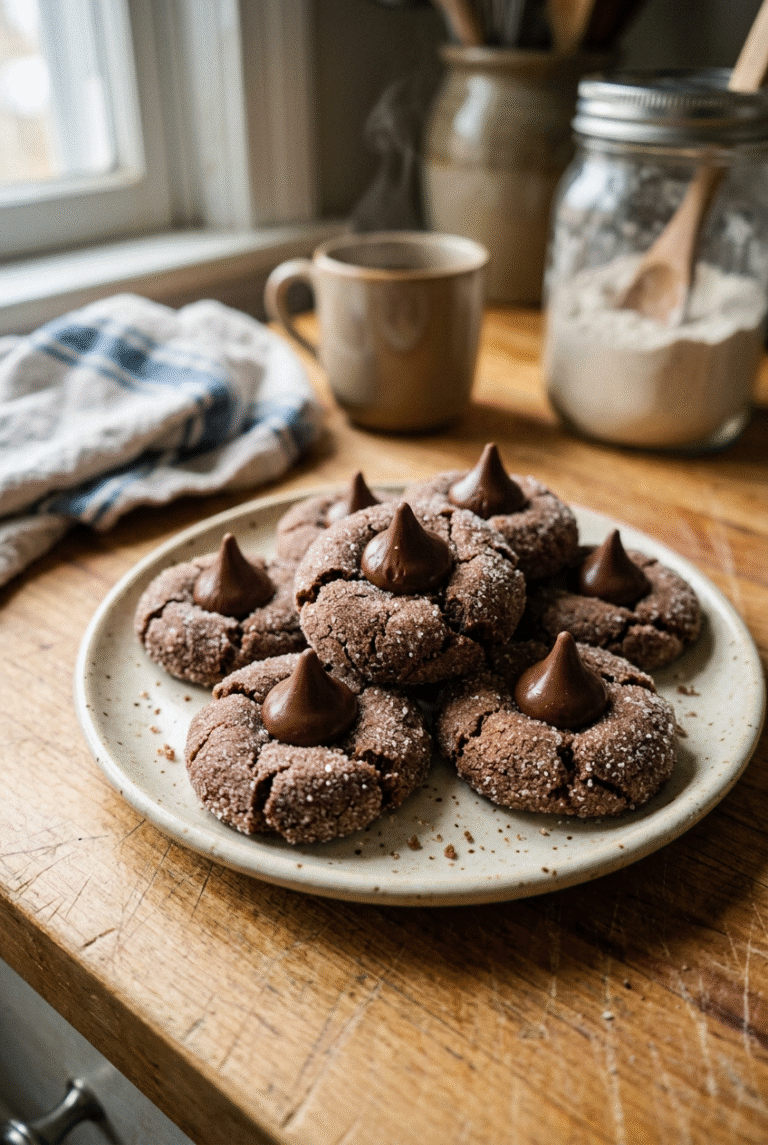
– 24 chocolate kisses (any variety, caramel kisses recommended) – Creates the signature blossom topping
Instructions
1-First Step: Preheat Your Oven and Prepare Baking Sheets Start by preheating your oven to 350 degrees Fahrenheit. Line your cookie sheets with parchment paper or silicone baking mats to prevent sticking and make cleanup easier. Having your workspace organized with all ingredients measured and ready will make the process smooth and enjoyable.
2-Second Step: Cream Together Your Butter and Sugars In a large mixing bowl, beat together the 3/4 cup softened butter, 1/2 cup granulated sugar, and 1/2 cup brown sugar until the mixture is light and fluffy. This should take about 2-3 minutes with an electric mixer on medium speed. Properly creaming the butter and sugars creates tiny air pockets that will help the cookies rise and gives them a pleasant texture.
3-Third Step: Add Egg and Vanilla Add the 1 egg and 1 tablespoon vanilla extract to the creamed butter mixture. Continue mixing until the ingredients are well incorporated and the mixture looks creamy and light in color. This should take another 1-2 minutes. The vanilla extract will intensify the chocolate flavor, so don’t be tempted to reduce the amount called for in this chocolate blossom cookies recipe.
4-Fourth Step: Combine Dry Ingredients In a separate medium bowl, whisk together the 1 1/2 cups all-purpose flour, 1/2 cup cocoa powder, 1 teaspoon baking soda, and 1/4 teaspoon salt. This ensures that the leavening agent is evenly distributed throughout the flour, which helps the cookies bake uniformly.
5-Fifth Step: Combine Wet and Dry Ingredients Gradually add the dry ingredients to the wet ingredients, mixing on low speed until just combined. The dough will be soft and slightly sticky, which is normal for this recipe. Do not add extra flour even if the dough seems too soft this would result in tough cookies rather than the tender, pillowy texture we’re aiming for. Remember: The secret to tender chocolate kiss cookies is handling the dough as little as possible once the flour is added. Overmixing develops gluten, which can make cookies tough rather than soft.
6-Sixth Step: Shape the Cookie Dough Roll or scoop the dough into equal-sized balls, about 1 tablespoon each. Roll them between your palms to form smooth spheres. Place the dough balls on the prepared cookie sheet, leaving about 2 inches between them to allow for spreading. If your kitchen is particularly warm, you might want to chill the dough balls for 30 minutes before baking to prevent excessive spreading.
7-Seventh Step: Bake the Cookies Bake the cookies for 7 to 9 minutes, or until they are puffy and no longer glossy on top. They might look slightly underbaked, but they will continue to set as they cool on the hot pan. Scientific research on chocolate consumption suggests that moderation is key, but enjoying treats like these in moderation can be part of a balanced lifestyle.
8-Eighth Step: Add the Chocolate Kisses Immediately after removing the cookies from the oven, gently press a chocolate kiss into the center of each cookie. The heat from the cookie will slightly melt the bottom of the kiss, helping it adhere. Make sure your kisses are unwrapped before you start baking so you can work quickly while the cookies are still hot.
9-Final Step: Cool Completely Let the cookies cool completely on the baking pan before moving them. This usually takes about 15-20 minutes. The kisses need time to firm up again, or they might slide off the cookies. Once completely cool, you can store them in an airtight container or serve immediately.
Last Step:
Please leave a rating and comment letting us know how you liked this recipe! This helps our business to thrive and continue providing free, high-quality recipes for you.Notes
🍪 Resist adding extra flour to the soft dough – it’s key for the tender, pillowy texture.
🎁 Unwrap all chocolate kisses before baking to press them in quickly while cookies are hot.
❄️ Chill dough balls for 30 minutes before baking if you notice too much spreading.
- Prep Time: 15 minutes
- Cook Time: 8 minutes
- Category: Desserts
- Method: Baking
- Cuisine: American
- Diet: Vegetarian
Nutrition
- Serving Size: 1 cookie
- Calories: 144 kcal
- Sugar: 11 g
- Sodium: 129 mg
- Fat: 8 g
- Saturated Fat: 5 g
- Unsaturated Fat: 3 g
- Trans Fat: 0 g
- Carbohydrates: 19 g
- Fiber: 1 g
- Protein: 2 g
- Cholesterol: 23 mg