Ingredients
– 2 and 1/4 cups (281g) All-purpose flour (plus more for rolling and work surface)
– 1/2 teaspoon Baking powder
– 1/4 teaspoon Salt
– 3/4 cup (12 Tbsp; 170g) Unsalted butter, softened
– 3/4 cup (150g) Granulated sugar
– 1 Large egg, at room temperature
– 2 teaspoons Pure vanilla extract
– 2 tablespoons (28g) Butter, melted and slightly cooled
– 1/4 cup (50g) Granulated sugar
– 1 tablespoon Ground cinnamon
– 1 cup (120g) Confectioners’ sugar
– 3 tablespoons (45ml) Milk
– 1/2 teaspoon Pure vanilla extract
Instructions
1-First Step: Prepare Your Workspace and IngredientsBefore beginning, clear a large workspace and gather all your ingredients. It’s important that your butter and egg are at room temperature for proper mixing. This ensures the dough comes together smoothly without needing excessive mixing, which could make the cookies tough. Measure all ingredients precisely using the measurements provided. Preparing your mise en place (everything in its place) makes the process flow seamlessly and prevents any scrambling halfway through.
2-Second Step: Mix the Dry IngredientsIn a medium bowl, whisk together the all-purpose flour, baking powder, and salt until well combined. This step ensures that the leavening agents are evenly distributed throughout the flour, which is crucial for uniform baking. Set this bowl aside while you prepare the wet ingredients. Whisking rather than sifting is perfectly fine for this recipe and saves time while still incorporating air into the dry mixture.
3-Third Step: Cream the Butter and SugarIn a large bowl, use an electric mixer to beat the softened unsalted butter and granulated sugar until smooth and creamy, which should take about 2 minutes. This process, called creaming, incorporates air into the mixture and creates a light texture in the finished cookies. The mixture should become noticeably lighter in color and fluffy. Don’t rush this step, as proper creaming is essential for cookies with the right texture.
4-Fourth Step: Add the Egg and VanillaAdd the room temperature egg and vanilla extract to the creamed butter and sugar mixture. Mix on medium speed until combined, about 1 minute. Scrape down the sides of the bowl as needed to ensure everything is incorporated evenly. At this point, your mixture should be smooth, creamy, and well-emulsified. The vanilla extract provides that classic background flavor that complements the cinnamon filling perfectly.
5-Fifth Step: Incorporate the Dry IngredientsWith your mixer on low speed, gradually add the dry flour mixture to the wet ingredients. Mix only until combined, being careful not to overmix. The dough may be slightly soft at this stage, which is normal. If it seems too sticky to handle, you can add 1 tablespoon of flour. Overmixing at this stage can lead to tough cookies, so stop as soon as you no longer see streaks of dry flour.
6-Sixth Step: Roll and Fill the DoughDivide the dough into two equal parts. On a floured silicone mat or parchment paper, roll each portion into a 9×7 inch rectangle about 1/4 inch thick. Working on a silicone mat makes cleanup much easier and prevents sticking. Spread 1 tablespoon of melted butter evenly over each rectangle. In a small bowl, mix the remaining granulated sugar and ground cinnamon, then sprinkle this mixture evenly over the buttered surfaces.
7-Seventh Step: Create the Cookie LogsStarting from one of the longer sides, roll each rectangle tightly into a 9-inch log. Roll slowly and carefully to maintain an even thickness. If small cracks form on the surface, gently smooth them with your fingers this won’t affect the taste and can even add rustic charm to the finished cookies. The goal is to create tight spirals that will hold their shape during baking.
8-Eighth Step: Chill the DoughWrap each log tightly in plastic wrap and place in the refrigerator to chill for at least 2 hours. This chilling period is crucial for several reasons. It firms the butter, prevents excessive spreading during baking, and makes the dough much easier to slice cleanly. For even better results, you can chill overnight. These logs can also be frozen for up to 3 months if you want to prepare them well in advance. This step is non-negotiable for achieving the perfect cookie shape!
9-Ninth Step: Preheat and Prepare Baking SheetsPreheat your oven to 350°F (177°C). Line baking sheets with parchment paper or silicone mats to prevent sticking and ensure easy cleanup. Proper oven temperature is essential for achieving evenly baked cookies with lightly browned edges. If your oven tends to run hot or cold, consider using an oven thermometer for accuracy. Having your baking sheets ready before removing the dough from the refrigerator will help you work quickly.
10-Tenth Step: Slice and Arrange the CookiesRemove the chilled dough logs from the refrigerator and unwrap. Using a sharp knife, slice the logs into 1/2 inch thick rounds. If the dough has become too firm to slice cleanly, let it sit at room temperature for 5-10 minutes. Place the slices 2 inches apart on the prepared baking sheets to allow room for slight spreading. This spacing ensures that the cookies bake evenly without merging into each other.
11-Eleventh Step: Bake to PerfectionBake the cookies for 10-11 minutes until they are lightly browned around the edges. The centers should still appear slightly soft, as they will continue to set as they cool. Avoid overbaking, as this can result in dry cookies rather than the desired soft, chewy texture. After removing from the oven, let the cookies cool on the baking sheet for 5 minutes before transferring to a wire rack to cool completely.
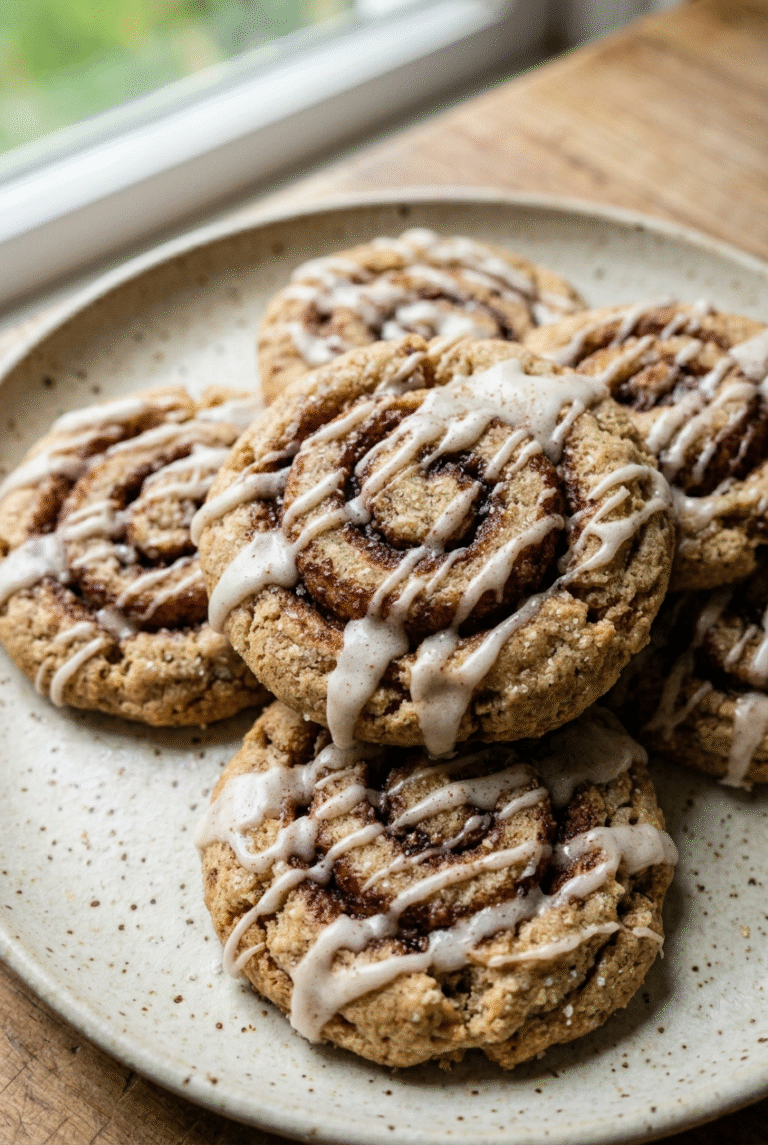
12-Twelfth Step: Prepare the IcingWhile the cookies are cooling, prepare the icing by whisking together the confectioners’ sugar, milk, and vanilla extract in a small bowl until smooth. Adjust the consistency by adding more milk for a thinner glaze or more sugar for a thicker frosting. The icing should be drizzling consistency not too runny, but not so thick that it clumps on the cookies. Drizzle the icing generously over the completely cooled cookies.
13-Final Step: Serve and EnjoyOnce iced, your Cinnamon Roll Cookies are ready to serve! These beauties are perfect on their own or paired with a cup of coffee, tea, or cold milk. Store any leftovers in an airtight container at room temperature for up to 5 days. If you’re a fan of other breakfast treats, you might also enjoy these Mini Earl Grey Honey Scones that are equally delightful for morning gatherings.
Last Step:
Please leave a rating and comment letting us know how you liked this recipe! This helps our business to thrive and continue providing free, high-quality recipes for you.Notes
❄️ Chill the dough logs for at least 2 hours to maintain shape and prevent spreading during baking.
🧈 Roll dough tightly and smooth cracks with fingers for perfect cinnamon swirls in every cookie.
🧹 Use a silicone baking mat for easy rolling, cleanup, and flawless cookie release.
- Prep Time: 20 minutes
- Chill: 2 hours
- Cook Time: 11 minutes
- Category: Desserts
- Method: Baking
- Cuisine: American
- Diet: Vegetarian
Nutrition
- Serving Size: 1 cookie
- Calories: 140 kcal
- Sugar: 15 g
- Sodium: 70 mg
- Fat: 7 g
- Saturated Fat: 4 g
- Unsaturated Fat: 3 g
- Trans Fat: 0 g
- Carbohydrates: 18 g
- Fiber: 0.5 g
- Protein: 1 g
- Cholesterol: 20 mg