Ingredients
– 4 oz (113 g) brick-style cream cheese, softened for creamy base
– 1 tablespoon salted butter, softened for smooth finish
– 4 cups (500 g) powdered sugar, plus extra for imprinting and additional as needed for stiff dough
– 1/2 teaspoon peppermint extract for signature fresh flavor
– 1/8 teaspoon vanilla extract for balanced flavor
– Food coloring (optional) for color customization
Instructions
1-First Step: Gather and Prepare Your Ingredients Start by setting out all your ingredients on the counter to ensure they’re at the right temperature. Soften the 4 oz of brick-style cream cheese and 1 tablespoon of salted butter by letting them sit for about 30 minutes, which makes mixing easier. Measure out the 4 cups of powdered sugar, 1/2 teaspoon of peppermint extract, and 1/8 teaspoon of vanilla extract; if you’re using food coloring, have it ready too. This initial setup, often called mise en place, helps busy parents and home cooks stay organized and avoid any last-minute rushes.
2-Second Step: Mix the Base In a large bowl, use an electric mixer to beat the softened cream cheese and butter together until they form a smooth and creamy mixture; this should take about 1-2 minutes on medium speed. For dietary adaptations, if someone prefers a less creamy version, you could use a reduced-fat cream cheese, though it might affect the texture slightly. Once blended, gradually add 2 cups of the powdered sugar on low speed until it’s fully incorporated, creating a thicker base that sets the stage for the flavors to shine.
3-Third Step: Add the Flavors Next, stir in the 1/2 teaspoon of peppermint extract and 1/8 teaspoon of vanilla extract to the mixture, blending them in thoroughly for an even distribution of taste. This step brings the minty freshness to the forefront while the vanilla adds a subtle balance, making the cream cheese mints more enjoyable. If adapting for preferences, you could experiment with other extracts, but for now, this combination keeps it classic and versatile for all audiences.
4-Fourth Step: Incorporate the Remaining Sugar Gradually mix in the remaining 2 cups of powdered sugar on low speed until the dough becomes stiff and non-sticky, scraping the bowl as needed to ensure everything combines well; this might take a few minutes and you could add more sugar if the dough feels too soft. Aim for a play-dough-like consistency that’s easy to handle, which is crucial for shaping. For those with allergies, consider sugar alternatives here, but note that it may change the final texture of your cream cheese mints.
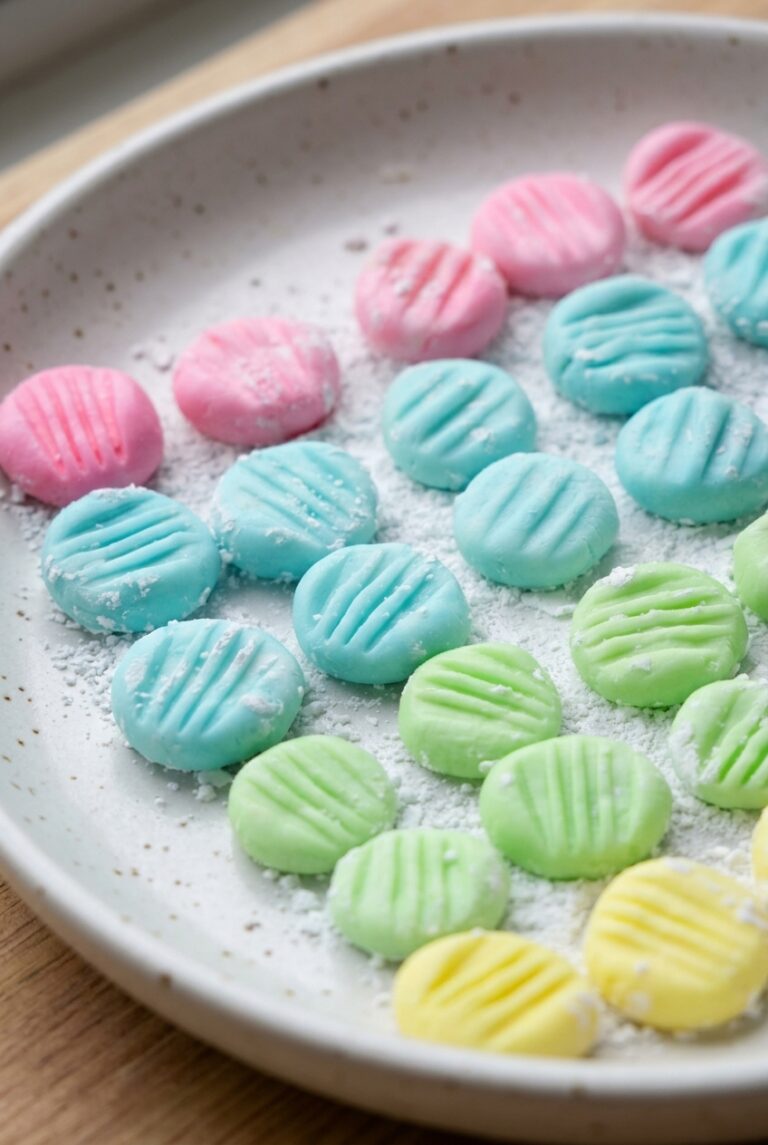
5-Fifth Step: Add Color and Shape the Mints Divide the dough into portions and knead in food coloring if desired, using just a few drops for a pastel look; this part is optional but adds a fun element for party hosts. For internal link, if you’re into other simple treats, check out our funfetti Greek yogurt muffins recipe for more colorful ideas. Roll the dough into teaspoon-sized balls and place them on a baking sheet lined with wax paper, then dust the tines of a fork with powdered sugar and gently press into each ball to create an imprint.
6-Sixth Step: Dry and Store Let the shaped mints dry at room temperature for several hours, about 3 hours as per the preparation time, until they firm up and are no longer sticky. Once dried, transfer them to an airtight container and refrigerate them to keep fresh. The total time for this recipe is around 3 hours and 15 minutes, including drying, making it perfect for newlyweds or seniors wanting a quick homemade gift.
7-Final Step: Serve and Enjoy After refrigeration, your cream cheese mints are ready to serve, offering a refreshing treat that pairs well with drinks like iced teas from our blog. For an external link, learn more about the benefits of peppermint in treats like these by visiting this resource on peppermint health benefits. Remember to store any leftovers properly, and enjoy how these mints add a special touch to your gatherings.
Last Step:
Please leave a rating and comment letting us know how you liked this recipe! This helps our business to thrive and continue providing free, high-quality recipes for you.Notes
🧀 Always use brick-style cream cheese to achieve the right creamy texture without separation.
🌿 Choose pure peppermint extract for an authentic mint flavor without any soapy aftertaste.
🎨 Opt for liquid food coloring to create soft pastel shades in your mints for a delicate look.
- Prep Time: 15 minutes
- Drying: 3 hours
- Category: Dessert
- Method: No-bake
- Cuisine: American
- Diet: Vegetarian
Nutrition
- Serving Size: 1 mint
- Calories: 41
- Sugar: 8g
- Sodium: 10mg
- Fat: 1g
- Saturated Fat: 1g
- Unsaturated Fat: 0g
- Trans Fat: 0g
- Carbohydrates: 8g
- Fiber: 0g
- Protein: 0g
- Cholesterol: 3mg