Ingredients
– 5.1 oz Chocolate Instant Pudding Mix
– 3 Cups Milk
– 8 oz Whipped Topping
– 24 Chocolate Sandwich Cookies
– 6 Double Chocolate Cookies
– Black Frosting or Black Edible Marker
– 6 Candy Pumpkins
– Edible Eyes
– Gummy Worms (optional, as needed for decoration)
Instructions
First Step: Prepare the Tombstones Start by creating the spooky tombstones that will sit atop your Halloween pudding cups. Take the 6 double chocolate cookies and write “RIP” on each one using black frosting or a black edible marker. This gives each cookie the appearance of a miniature graveyard tombstone. Set these aside to allow any frosting to dry slightly before assembly.
Second Step: Make the Pudding Base In a stand mixer, whisk together the 5.1 oz chocolate instant pudding mix and 3 cups of milk on medium speed for about 2 minutes. The mixture will start to thicken as you mix. Once well combined, gently fold in the 8 oz of whipped topping until the mixture is smooth and well blended. This creates a light, creamy pudding that forms the base of our Halloween pudding cups.
Third Step: Create the Graveyard Dirt Take the 24 chocolate sandwich cookies and crush them into fine crumbs using a food processor or by placing them in a sealed plastic bag and rolling over them with a rolling pin. The crumbs should resemble soil or dirt, which will create the graveyard effect in our pudding cups. Set aside about half of these crumbs for the topping and use the rest for the layers.
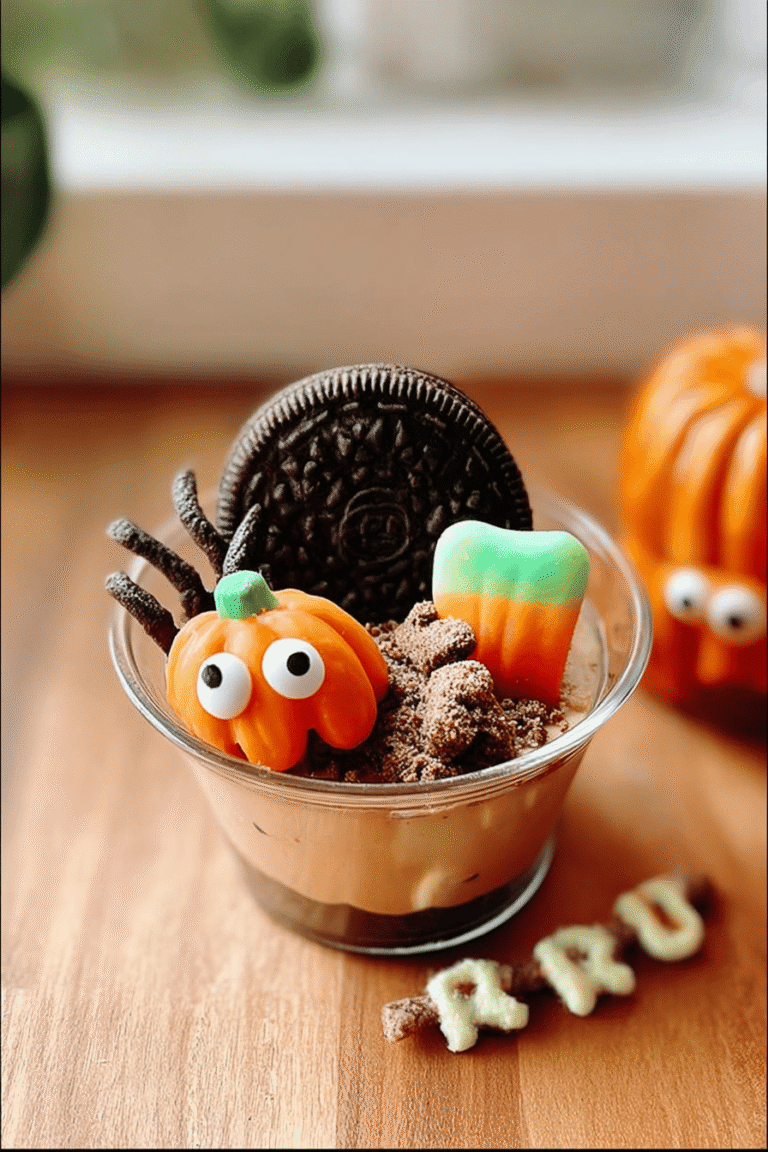
Fourth Step: Assemble the Layers Now it’s time to assemble your Halloween pudding cups. Take six clear 9 oz plastic cups so that the layers will be visible. Sprinkle 3-4 tablespoons of the cookie crumbs into the bottom of each cup. Press a few edible eyes between the crumbs and the edges of the cups so they appear to be peeking out from the dirt. Spoon an even layer of the pudding mixture over the crumbs in each cup. Then repeat the process: sprinkle another layer of crumbs with more edible eyes pressed into them, followed by another layer of pudding. This layering creates a more authentic graveyard dirt appearance.
Fifth Step: Add the Final Toppings Finish your Halloween pudding cups by sprinkling more cookie crumbs on top until almost reaching the lip of each cup. Insert one cookie tombstone firmly into the center of each pudding cup. The tombstone should stand upright in the “graveyard dirt.” Place one candy pumpkin beside each tombstone, as if it’s growing in the graveyard. If you want to enhance the creepy factor, add a few gummy worms as decoration, making it look like they’re emerging from the dirt.
Last Step:
Please leave a rating and comment letting us know how you liked this recipe! This helps our business to thrive and continue providing free, high-quality recipes for you.Notes
🕯️ Write RIP on tombstone cookies beforehand to achieve the perfect spooky look.
👻 Using clear cups shows off the layering effect of ‘dirt’ and crumbs beautifully.
🧟 Press edible eyes between the crumbs for a fun and creepy Halloween touch.
- Prep Time: 25 minutes
- Cook Time: 0 minutes
- Category: Dessert
- Method: No Bake
- Cuisine: American
- Diet: Vegetarian
Nutrition
- Serving Size: 1 pudding cup