Ingredients
– 4 large egg yolks for creating the custard base
– 2/3 cup granulated sugar for sweetening and balancing tartness
– 1 tablespoon lemon zest for adding fragrance and citrus depth
– 1/3 cup fresh lemon juice for giving the curd its tangy flavor
– 1/8 teaspoon salt for rounding out the taste
– 6 tablespoons unsalted butter for creating a smooth, glossy finish
Instructions
1-First Step: Set up the double boiler Fill the bottom of a double boiler with 1 to 2 inches of water and bring it to a simmer over high heat. Then reduce the heat to low so the water stays gently steaming rather than boiling hard. This gentle setup helps the curd cook evenly and keeps the eggs from curdling. If you do not have a double boiler, set a heatproof glass bowl over a saucepan of simmering water. Make sure the bottom of the bowl does not touch the water. This simple swap works well for a homemade lemon curd and gives you more control.
2-Second Step: Whisk the base ingredients In the top of the double boiler, combine the egg yolks, sugar, lemon zest, lemon juice, and salt. Whisk until everything looks smooth and well blended. At this point, the mixture will be thin and pale yellow. Use non-metal equipment if possible. Metal can leave a slight metallic taste, especially when it meets acidic lemon juice. A whisk and bowl made from glass, silicone, or other non-reactive material is a smart choice for this tangy lemon curd.
3-Third Step: Cook slowly until thick Whisk constantly as the mixture cooks. Keep the heat low and steady so the curd thickens gradually instead of scrambling. After about 10 minutes, it should look thick and glossy, with a texture similar to hollandaise sauce or a pudding that lightly coats the back of a spoon. If you use a thermometer, aim for 170°F. That temperature is a helpful sign that the eggs have thickened safely. You may notice the mixture getting more opaque and becoming silky as it cooks. This is the moment where the magic happens in an easy homemade lemon curd recipe.
4-Fourth Step: Add the butter Remove the pan from the heat once the curd is thick. Whisk in the butter pieces one at a time until each piece melts and disappears into the mixture. The butter gives the curd its rich, glossy finish and turns it into that dreamy silky lemon curd texture everyone loves. If you want a thicker spread for cake filling or tart layers, use the option of 2 egg yolks plus 1 whole egg next time. That variation creates a firmer texture while still tasting bright and creamy.
5-Fifth Step: Strain and chill Pour the curd into a jar or bowl. For an extra smooth texture, strain it through a fine mesh sieve to catch any cooked bits of egg zest or tiny lumps. This step is not required, but it gives you a very polished finish. Press plastic wrap directly onto the surface of the curd before chilling. This keeps a skin from forming on top. Refrigerate until fully cooled and thickened. The total time for the recipe is about 1 hour and 15 minutes, including cooling. The active prep time is about 5 minutes, with 10 minutes of cooking time.
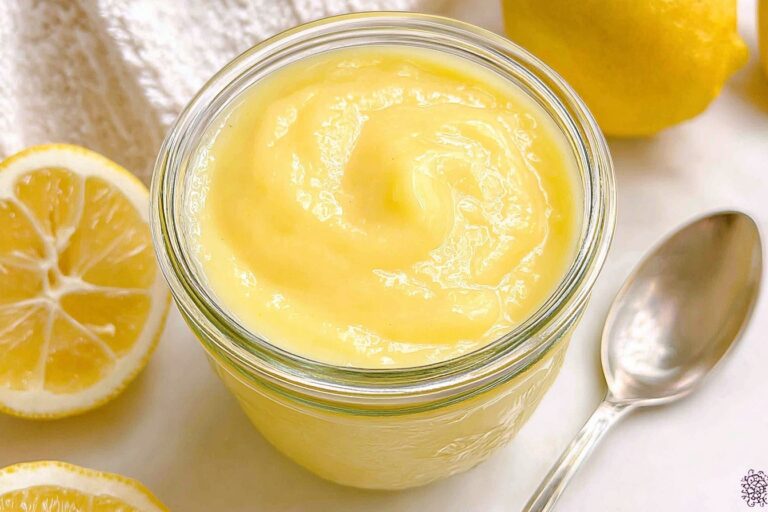
6-Final Step: Serve and enjoy Once chilled, your silky smooth and tangy lemon curd is ready to use. Spread it on warm toast, pile it onto scones, spoon it into muffins, or use it as a filling for cakes, cupcakes, and tarts. It also tastes wonderful on yogurt or cheesecakes.
Last Step:
Please leave a rating and comment letting us know how you liked this recipe! This helps our business to thrive and continue providing free, high-quality recipes for you.Notes
🔥 Use a double boiler or heatproof bowl over simmering water to gently cook without curdling or scorching.
🍋 Always opt for fresh-squeezed lemon juice and zest for the brightest, most vibrant flavor – avoid bottled.
🧊 Cover surface with plastic wrap before chilling to avoid skin formation; stores up to 10 days in fridge.
- Prep Time: 5 minutes
- Chill: 60 minutes
- Cook Time: 10 minutes
- Category: Sauces & Condiments
- Method: Double Boiler
- Cuisine: British
- Diet: Vegetarian, Gluten-Free
Nutrition
- Serving Size: 2 tablespoons
- Calories: 103 kcal
- Sugar: 12 g
- Sodium: 40 mg
- Fat: 6 g
- Saturated Fat: 3.5 g
- Unsaturated Fat: 2.5 g
- Trans Fat: 0 g
- Carbohydrates: 12 g
- Fiber: 0 g
- Protein: 1 g
- Cholesterol: 75 mg