Ingredients
– 4 large egg yolks for thickening the curd
– 2/3 cup granulated sugar for balancing acidity
– 1 tablespoon lemon zest for strong lemon flavor and aroma
– 1/3 cup fresh lemon juice for adding tang
– 1/8 teaspoon salt for sharpening the flavor
– 6 tablespoons unsalted butter for making it creamy
Instructions
1-First Step: Gather and prep everything Before you start cooking, measure all ingredients and have a medium saucepan, whisk, fine-mesh strainer, and heat-safe bowl ready. Separate the eggs if needed and zest the lemon before juicing it. This keeps the process smooth and helps you move quickly once the heat is on. If you are making a thicker lemon curd for cakes or tart filling, use the version with 2 egg yolks plus 1 whole egg. For a softer spread, stick with 4 large egg yolks. Either way, room-temperature eggs mix more easily and lower the risk of curdling.
2-Second Step: Whisk the base together In the saucepan, whisk together the egg yolks, sugar, lemon zest, lemon juice, and salt until the mixture looks well combined. The sugar should start dissolving, and the mixture will smell wonderfully bright already. This is where the tangy lemon curd recipe begins to take shape. Use a heavy-bottomed pan if you have one. It helps spread the heat more evenly and gives you a little extra protection from scorching. If you are watching the sugar, do not cut it too far because it helps the curd set correctly.
3-Third Step: Cook slowly over medium-low heat Place the pan over medium-low heat and keep whisking constantly. Do not walk away. The mixture will start out thin, then slowly thicken as the eggs cook gently. Stay patient and keep the heat low so the eggs do not scramble. After about 8 to 10 minutes, the curd should coat the back of a spoon. If you use a thermometer, aim for about 170°F. That is the sweet spot for a silky smooth lemon curd. If the heat seems too strong, lift the pan off the burner for a few seconds while whisking, then return it to the heat.
4-Fourth Step: Add the butter and finish the texture Once the curd thickens, remove it from the heat right away. Add the softened butter pieces one at a time, whisking until each piece melts into the mixture. The curd should turn glossy and smooth. This step gives homemade lemon curd its rich, luscious finish. If you used salted butter, remember to skip the added salt next time for balance. Butter that is softened, not cold, blends faster and helps the curd stay creamy. If the curd looks slightly grainy at first, keep whisking. It usually smooths out as the butter melts fully.
5-Fifth Step: Strain for a silky finish Pour the finished curd through a fine-mesh sieve into a clean bowl or jar. This removes any bits of zest or tiny cooked egg pieces and gives you that classic silky smooth lemon curd texture. Straining is especially helpful if you want a polished lemon filling for cakes or a tart shell. If you like a little extra zest in your curd, you can gently press the mixture through the sieve instead of stirring it all the way through. Just do not force any cooked bits that stay behind. The goal is smooth and creamy, not lumpy and stubborn.
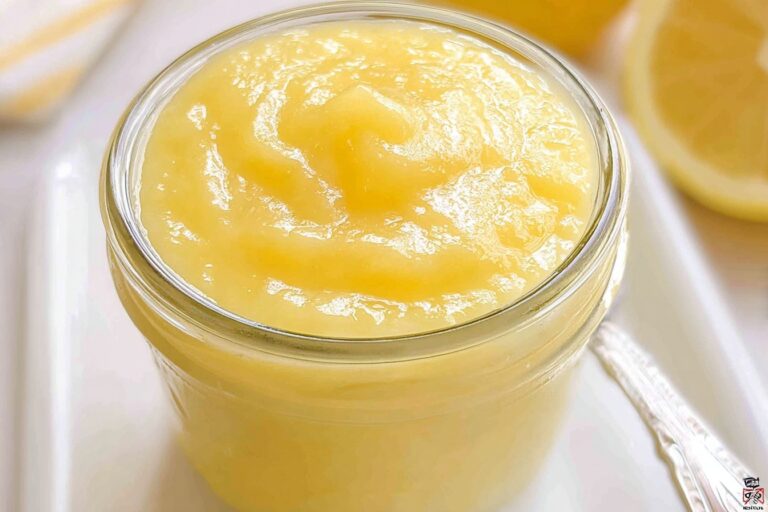
6-Final Step: Cool and use Let the curd cool at room temperature before covering and chilling it. As it cools, it will thicken more. Once cold, it is ready to spread, spoon, swirl, or layer into your favorite treats. Use it for lemon curd for cakes, lemon curd tart filling, pancakes, scones, or even simple yogurt bowls. If you want to serve it soon, you can keep it at room temperature for a short while after straining, but always refrigerate it for storage. It tastes even brighter after chilling for a few hours.
Last Step:
Please leave a rating and comment letting us know how you liked this recipe! This helps our business to thrive and continue providing free, high-quality recipes for you.Notes
🍋 Use fresh lemons for the brightest, most vibrant flavor.
🔥 Stir constantly over low heat to avoid curdling the eggs.
🧈 Stores in an airtight container in the fridge for up to 2 weeks.
- Prep Time: 10 minutes
- Chill Time: 1 hour
- Cook Time: 10 minutes
- Category: Desserts
- Method: Stovetop
- Cuisine: American
- Diet: Vegetarian, Gluten-Free
Nutrition
- Serving Size: 2 tablespoons
- Calories: 120 kcal
- Sugar: 11g
- Sodium: 25mg
- Fat: 8g
- Saturated Fat: 5g
- Unsaturated Fat: 2.5g
- Trans Fat: 0g
- Carbohydrates: 11g
- Fiber: 0g
- Protein: 1g
- Cholesterol: 80mg