Ingredients
– 12 Sugar Cookies Base for the snowmen
– 2 cups Royal Icing Creates melting snow effect
– 6 (cut in half) Marshmallows Snowman heads
– As needed Orange Sprinkles Carrot noses
– As needed Chocolate Candies Snowman buttons
– As needed Black Gel Food Coloring Facial features and arms
Instructions
1-First Step: Prepare Your Workstation and Ingredients Before you begin decorating, set yourself up for success by organizing your workspace. Clear a large counter or table and protect it with parchment paper or a silicone mat. Gather all your ingredients and tools within easy reach. You’ll need piping bags, scissors, small bowls for separating your icing, and a damp paper towel for cleaning up any spills. Start by preparing your black icing first. Take about 1/2 cup of your royal icing and add black gel food coloring a drop at a time until you reach your desired shade. Remember that the color will deepen slightly as the icing dries, so aim for a slightly lighter black than you want in the final result. Thin this black icing to what decorators call “15-second consistency” this means when you drag a knife through the icing, the line should disappear in about 15 seconds. This consistency is perfect for piping fine details like arms and facial features. Place this black icing in a piping bag and snip a tiny tip at the corner.
2-Second Step: Prepare the White Icing With your black icing ready, it’s time to prepare the white “melting snow” icing. Take the remaining royal icing and thin it to “10-second consistency.” This should be slightly thicker than your black icing when you drag a knife through it, the line should disappear in about 10 seconds. This specific consistency is crucial for achieving the melting effect. If it’s too thick, it won’t drip naturally over the edges of the cookies. If it’s too thin, it will run right off! Finding that perfect balance might take a little practice, but don’t worry even imperfect drips add to the charming “melting” look. Once you’ve achieved the right consistency, transfer the white icing to a piping bag and snip a small tip at the corner. You’re now ready to start decorating your cookies!
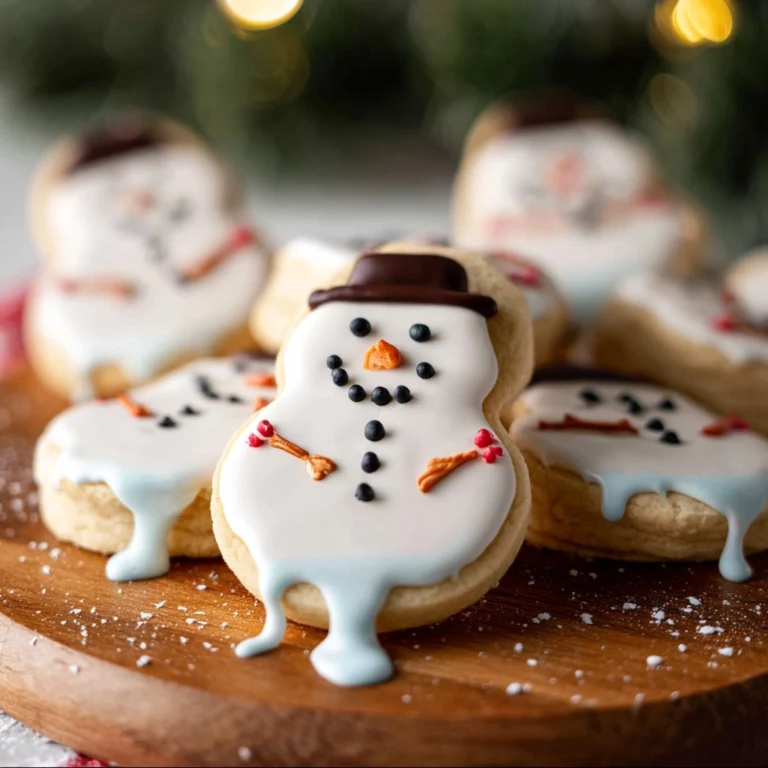
3-Third Step: Create the Melting Snow Base Now comes the fun part bringing your snowmen to life! Starting with your first sugar cookie, pipe the white royal icing onto the center of the cookie. Gently encourage the icing to spread toward the edges, allowing it to drip slightly over the sides. This creates the effect of a snowman melting into a puddle. Don’t worry about making every cookie look identical. Variation in the melting pattern actually adds to the charm, making each snowman unique. If you’re having trouble getting the icing to drip, you can gently tap the cookie on the counter or use a toothpick to guide the flow. Work on one cookie at a time for the next few steps, as you’ll need to add decorations while the white icing is still wet. If you find the white icing is drying too quickly, you can cover the piping bag with a damp paper towel to keep it moist.
4-Fourth Step: Add the Snowman Head and Features While the white icing is still wet, immediately place one half of a marshmallow toward the back of each cookie. This will serve as your snowman’s head. Position it slightly off-center, as if the snowman has started melting and sliding backward on the cookie. Next, add two or three small round chocolate candies as buttons down the front of the “melting snow” body. Press them gently into the icing so they adhere without sinking completely. These chocolate buttons not only look cute but also add a delicious chocolate element to contrast with the sweetness of the cookie and marshmallow.
5-Fifth Step: Create the Arms Using your black icing, pipe two stick arms “floating” away from the marshmallow head. The key word here is “floating” these arms should look like they’re raised in surprise or greeting, not resting on the ground. Create a simple Y-shape with three small “fingers” at the end of each arm. Since the black icing is thinner than the white, it will blend slightly with the wet white icing, creating a nice transition. This technique gives the appearance that the arms are emerging from the snow, adding depth to your design. If you make a mistake, remember that each snowman has its own personality, and “quirky” arms just add character!
6-Sixth Step: Let the Icing Set Once you’ve decorated all your cookies, set them aside for 20-30 minutes to let the icing harden. This setting period is crucial you want the decorations to be firm before adding the facial features. Place the cookies on a flat surface where they won’t be disturbed. If you’re working in a humid environment, you might need to allow a bit more time for the icing to set. A fan can help speed up the process, but be careful not to direct it too closely to the cookies, as this could cause the marshmallows to dry out too much. During this waiting period, you can clean up your workspace and prepare for the final decorating step.
7-Final Step: Add Facial Expressions Now for the personality! Using your black icing, carefully pipe two eyes on each marshmallow head. Then add a surprised “O” shaped mouth right below the eyes. This expression of surprised delight is part of what makes these cookies so charming and fun. For the final touch, attach an orange sprinkle as the carrot nose. Dip the tip of the sprinkle into a tiny bit of leftover white icing (this acts as glue) and gently place it between the eyes and mouth. Hold it in place for a few seconds to ensure it adheres properly. Let your finished cookies dry completely at room temperature for several hours or overnight. This ensures the icing hardens completely and the decorations stay in place. Once dry, your adorable Melting Snowman Cookies are ready to be shared and enjoyed!
Last Step:
Please leave a rating and comment letting us know how you liked this recipe! This helps our business to thrive and continue providing free, high-quality recipes for you.Notes
🌊 Thin royal icing more than usual for perfect drippy snowman melt effect.
👨👩👧👦 Kid-friendly decorating that’s quick and mess-free fun.
🛡️ Store in airtight container; avoid fridge to keep marshmallows soft.
- Prep Time: 20 minutes
- Setting: 20-30 minutes
- Category: Desserts
- Method: No-bake
- Cuisine: American
- Diet: Vegetarian
Nutrition
- Serving Size: 1 cookie
- Calories: 250 kcal
- Sugar: 25g
- Sodium: 150mg
- Fat: 10g
- Saturated Fat: 4g
- Unsaturated Fat: 5g
- Trans Fat: 0g
- Carbohydrates: 38g
- Fiber: 1g
- Protein: 2g
- Cholesterol: 5mg