Ingredients
– 3 cups whole milk
– 1/3 cup uncooked Jasmine rice (or any short, medium, or long grain rice)
– 1/4 cup sugar (white sugar recommended; alternatives like maple sugar, coconut sugar, or brown sugar can be used)
– 1 teaspoon vanilla extract
– Cinnamon for sprinkling
Instructions
1-Preparation Phase: Before you begin cooking, there’s one crucial step: rinsing your rice. Rinse the uncooked Jasmine rice 2-3 times under cold water until the water runs clear. This removes excess surface starch that can make your pudding gluey or overly thick. While this might seem like a small detail, it makes a significant difference in the final texture of your rice pudding recipe no eggs.
2-First Step: Heating the Milk In a medium saucepan, bring 3 cups of whole milk to a gentle boil over medium heat. Keep an eye on the pot to prevent the milk from scorching or boiling over. You can stir occasionally to ensure even heating. If you’re using a plant-based milk alternative, coconut milk works exceptionally well in this rice pudding recipe no eggs and provides a lovely tropical note to the final dish.
3-Second Step: Adding the Rice Once the milk reaches a boil, carefully add the rinsed rice to the pot. Stir gently to distribute the rice evenly in the milk. This is the point where the magic begins as the rice starts absorbing the creamy liquid, creating the foundation of your pudding.
4-Third Step: Simmering to Perfection Reduce the heat to low and cover the saucepan with the lid slightly cracked to allow steam to escape. Let the mixture simmer gently for 40 minutes to 1 hour. This is a mostly hands-off process, but you’ll want to stir the mixture every 15 minutes to prevent sticking and ensure even cooking. During this time, the rice will soften and absorb the milk, while the mixture will naturally thicken into a creamy consistency. Patience is key here good things take time!
5-Fourth Step: Adding Flavor Once your rice is tender and the mixture has reached your desired thickness, remove the saucepan from the heat. Stir in 1/4 cup of sugar and 1 teaspoon of vanilla extract until well combined. The sugar will dissolve quickly in the hot mixture, and the vanilla will infuse its wonderful aroma throughout the pudding. This is when your kitchen will start smelling absolutely amazing!
6-Fifth Step: Resting for Perfection Let the pudding sit for about 10 minutes after adding the sugar and vanilla. This resting period allows the sugar to fully dissolve and gives the flavors time to meld together. You’ll notice the pudding continuing to thicken slightly as it cools. This step is simple but essential for developing the depth of flavor that makes this rice pudding recipe no eggs so special.
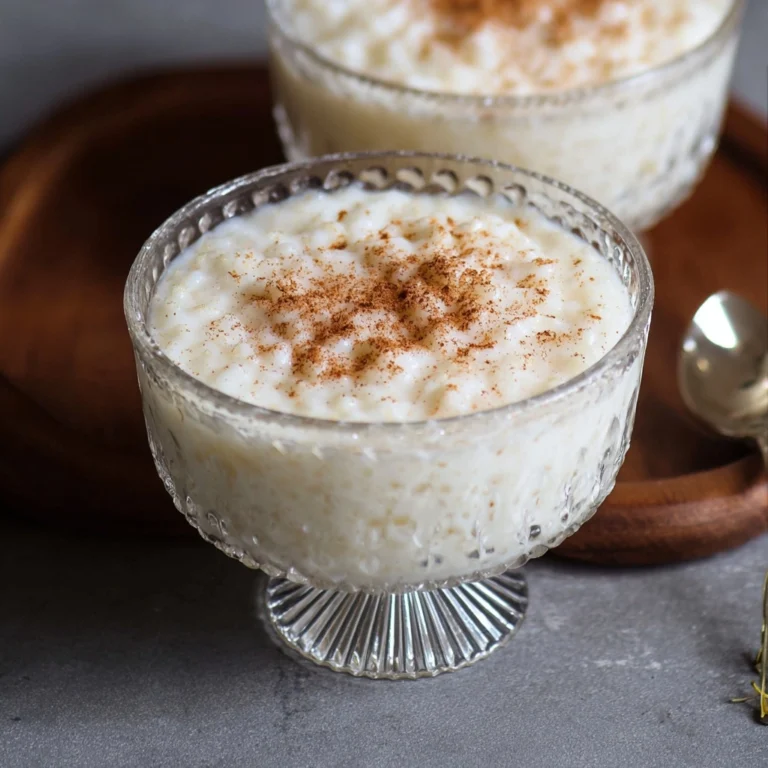
7-Final Step: Serving Your Creation Spoon the pudding into individual serving dishes and sprinkle with cinnamon for that classic finishing touch. You can serve it warm for immediate comfort or refrigerate for a cool, refreshing treat. Either way, this rice pudding recipe no eggs delivers a perfectly creamy texture and delightful flavor that will have everyone asking for seconds.
Last Step:
Please leave a rating and comment letting us know how you liked this recipe! This helps our business to thrive and continue providing free, high-quality recipes for you.Notes
🚿 Rinse rice thoroughly to prevent gummy texture and ensure fluffy grains.
🥛 Full-fat milk yields creamiest results; sub coconut milk for dairy-free version.
❄️ Store in fridge up to 5 days; reheat gently with extra milk for silky smoothness.
- Prep Time: 5 minutes
- Cook Time: 50 minutes
- Category: Desserts
- Method: Stovetop
- Cuisine: American
- Diet: Vegetarian, Gluten-Free
Nutrition
- Serving Size: 1 cup
- Calories: 250 kcal
- Sugar: 18g
- Sodium: 100mg
- Fat: 8g
- Saturated Fat: 5g
- Unsaturated Fat: 2g
- Trans Fat: 0g
- Carbohydrates: 35g
- Fiber: 0g
- Protein: 8g
- Cholesterol: 25mg