Ingredients
– 3 very ripe bananas, medium/large size for moisture, natural sweetness, and banana flavor
– ½ cup unsalted butter (8 tablespoons), at room temperature for richness and tender texture
– ¾ cup sugar for balancing flavors, browning, and moisture retention
– 2 large eggs, lightly beaten for structure and binding
– 1 ½ cups all-purpose flour for base structure
– 1 teaspoon baking soda for leavening
– ½ teaspoon salt for enhancing flavor and balancing sweetness
– ½ teaspoon vanilla extract for flavor depth and complexity
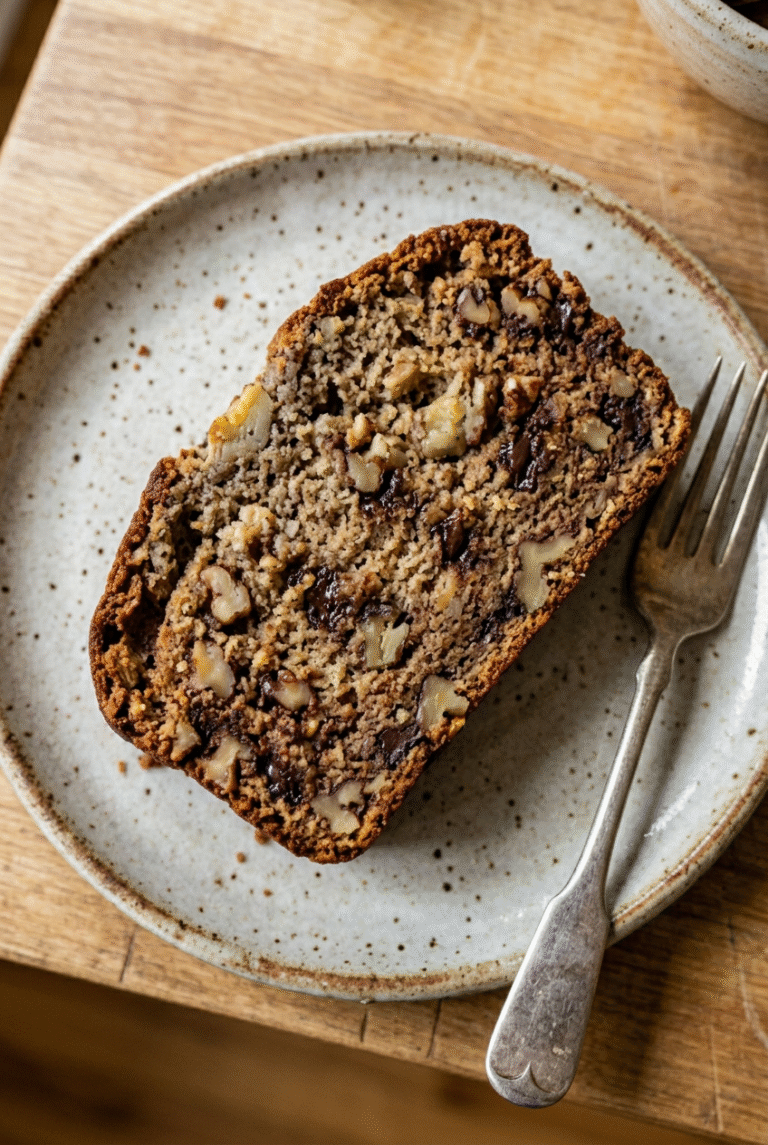
– 1 cup walnuts (optional) for crunch, texture, and healthy fats
– ½ cup raisins (optional) for chewy texture and natural sweetness
Instructions
1-First Step: Prepare Your Workspace and Ingredients Before you begin mixing, it’s essential to have everything ready. Start by preheating your oven to 350°F. This ensures your banana bread starts baking immediately once you put it in the oven, which helps with proper rising. Next, prepare your loaf pan by greasing it thoroughly with butter or cooking spray, then lightly flouring it. The ideal pan dimensions are approximately 9.25 inches long, 5.25 inches wide, and 2.75 inches deep. This preparation prevents sticking and makes for easy removal later. While the oven heats up, take your butter out of the refrigerator if you haven’t already. It needs to be at room temperature for proper creaming. This small detail makes a significant difference in the final texture of your bread. Gather all your ingredients and measure them precisely. Baking is a science, and accurate measurements ensure consistent results every time.
2-Second Step: Toast and Prepare the Walnuts If you’re including walnuts in your recipe, this is the perfect time to prepare them. Place the walnuts in a dry skillet over medium heat. Toast them lightly while stirring continuously to prevent burning. This process enhances their natural flavor and adds a delightful crunch to your finished bread. Keep a close eye on them as nuts can go from perfectly toasted to burned very quickly. Once the walnuts are fragrant and slightly golden, remove them from the heat and let them cool completely. After cooling, chop them coarsely. You want pieces large enough to provide noticeable texture but small enough to distribute evenly throughout the loaf. If you’re making nut-free banana bread for allergy reasons, simply skip this step.
3-Third Step: Cream the Butter and Sugar In a mixing bowl, combine the softened butter and sugar. If you’re using honey as a healthier alternative, now’s the time to add it instead of sugar. Cream these ingredients together until they’re light and fluffy. This process incorporates air into the mixture, which helps create a lighter texture in your finished bread. An electric mixer makes this step easier, but you can also accomplish it with vigorous stirring using a wooden spoon or whisk. Proper creaming typically takes 2-3 minutes with an electric mixer. You’ll notice the mixture becomes pale in color and increases in volume. This aeration is crucial for the bread’s structure. If you’re using honey instead of sugar, the mixture won’t become as fluffy, but it will still provide sweetness and moisture to your banana bread.
4-Fourth Step: Add Bananas and Eggs Now it’s time to incorporate the star ingredient. Mash your very ripe bananas until they reach a chunky applesauce consistency. You don’t want them completely smooth small pieces of banana add delightful pockets of flavor throughout the bread. Add the mashed bananas to your creamed butter and sugar mixture. Next, add your lightly beaten eggs. Mix everything until well blended. The combination of bananas and eggs creates the liquid base of your batter. At this stage, the mixture might look slightly curdled or separated, but don’t worry this is normal and will come together once you add the dry ingredients.
5-Fifth Step: Incorporate Dry Ingredients In a separate bowl, whisk together the flour, baking soda, and salt. This step ensures that the leavening agent is evenly distributed throughout the flour, which helps your banana bread rise uniformly. Once combined, add these dry ingredients to your wet batter. Mix gently just until the flour is incorporated. Be careful not to overmix, as this can develop the gluten in the flour and result in tough bread. Some small lumps are perfectly fine and will disappear during baking. The batter should be thick but still pourable.
6-Sixth Step: Add Flavorings and Mix-Ins Add the vanilla extract to your batter for that signature aromatic flavor. If you’re using toasted walnuts and raisins, fold them in now. Use a spatula to gently distribute these ingredients evenly throughout the batter. If you prefer chocolate chips instead of nuts and raisins, this is when to add them about ½ to 1 cup depending on your preference. Once everything is combined, pour the batter into your prepared loaf pan. Use your spatula to spread it evenly and smooth the top. Give the pan a gentle tap on the counter to release any air bubbles trapped in the batter.
7-Seventh Step: Bake to Perfection Place your banana bread in the preheated oven and bake for 55 to 60 minutes. Every oven behaves differently, so start checking for doneness around the 50-minute mark. The bread is done when a toothpick inserted in the center comes out clean or with just a few moist crumbs clinging to it. The top should be golden brown, and you’ll likely notice it has a delicious crack down the center this is perfectly normal and actually a good sign! If the bread is browning too quickly before it’s fully cooked, you can loosely tent it with aluminum foil for the last 10-15 minutes of baking.
8-Final Step: Cool and Serve Remove the banana bread from the oven and let it rest in the pan for 10 minutes. This resting period is crucial as it allows the bread to set and makes removal much easier. After 10 minutes, run a knife around the edges of the pan to loosen the bread, then turn it out onto a wire rack to cool completely. Resist the temptation to cut into the bread while it’s still warm, as it will be more likely to crumble. Once completely cooled, slice and enjoy! This bread is delicious on its own, but you can also serve it with a pat of butter, a drizzle of honey, or even a smear of cream cheese for an extra special treat.
Last Step:
Please leave a rating and comment letting us know how you liked this recipe! This helps our business to thrive and continue providing free, high-quality recipes for you.Notes
🍌 Use very ripe, spotty bananas for the best moisture and natural sweetness in your bread.
🥜 Omit walnuts and raisins for a nut-free version; the bread stays deliciously moist.
🌡️ Ripen bananas faster by placing them in a paper bag with an apple overnight.
- Prep Time: 10 minutes
- Cook Time: 60 minutes
- Category: Breakfast
- Method: Baking
- Cuisine: American
- Diet: Vegetarian
Nutrition
- Serving Size: 1 slice
- Calories: 350 kcal
- Sugar: 20 g
- Sodium: 243 mg
- Fat: 18 g
- Saturated Fat: 7 g
- Unsaturated Fat: 11 g
- Trans Fat: 0 g
- Carbohydrates: 45 g
- Fiber: 3 g
- Protein: 5 g
- Cholesterol: 57 mg