Ingredients
– 2 cups all-purpose flour
– 2 cups sugar
– 3/4 cup unsweetened cocoa powder
– 2 teaspoons baking powder
– 1 1/2 teaspoons baking soda
– 1 teaspoon salt
– 1 teaspoon espresso powder
– 1 cup milk or buttermilk, almond milk, oat milk, or coconut milk
– 1/2 cup vegetable oil, canola oil, or melted coconut oil
– 2 large eggs
– 2 teaspoons vanilla extract
– 1 cup boiling water
Instructions
1-First Step: Oven and Pan PreparationStart by preheating your oven to 350º F (175º C). Proper temperature is crucial for the chemical reactions that make your cake rise and set correctly. While the oven heats, prepare your baking pans. This recipe works best with two 9-inch round cake pans that are 2 inches deep. Generously grease each pan with butter, oil, or cooking spray, then lightly dust with flour, shaking out any excess. Alternatively, you can use a pan release product or line the bottoms with parchment paper rounds for guaranteed easy removal later. Taking this step thoroughly prevents the cake from sticking and ensures your beautiful layers come out intact.
2-Second Step: Measuring and Combining Dry IngredientsIn a large mixing bowl or the bowl of your stand mixer, combine all your dry ingredients. Add the 2 cups of all-purpose flour, 2 cups of sugar, 3/4 cup of unsweetened cocoa powder, 2 teaspoons of baking powder, 1 1/2 teaspoons of baking soda, 1 teaspoon of salt, and 1 teaspoon of espresso powder. Whisk these ingredients together thoroughly until they are well combined and uniform in color. This step distributes the leavening agents evenly throughout the flour, ensuring your cake rises consistently. There’s no need to sift these ingredients as long as you whisk well to break up any small lumps in the cocoa powder. For the most accurate results, use the spoon-and-level method for measuring your flour spooning it into your measuring cup and leveling off the excess with a straight edge rather than scooping directly, which can compact the flour and throw off the ratio.
3-Third Step: Adding Wet IngredientsWith your dry ingredients ready, it’s time to add the wet components. Pour in 1 cup of milk (dairy or your preferred plant-based alternative), 1/2 cup of vegetable oil (or canola or melted coconut oil), 2 large eggs (at room temperature if possible, as they incorporate better), and 2 teaspoons of vanilla extract. Using a stand mixer or hand mixer on medium speed, blend these ingredients into the dry mixture. Mix just until incorporated there’s no need to worry about overmixing at this stage since we’ll be adding more liquid shortly. The mixture will appear somewhat thick and may have a few small lumps, which is perfectly normal. If you’re using a stand mixer, the paddle attachment works best for this step. For those who enjoy mixing by hand, ensure you’re thorough in combining the wet and dry ingredients to prevent flour pockets in the final cake.
4-Fourth Step: The Boiling Water MagicThis next step might seem unusual, but trust me it’s the secret to an incredibly moist chocolate cake. Reduce your mixer speed to low and carefully pour in 1 cup of boiling water. Take caution during this step to avoid splashing hot water. The batter will immediately become very thin, which might seem alarming if you’re used to thicker cake batters, but this is exactly what you want. Continue mixing until the batter is smooth and uniform in consistency. The boiling water “blooms” the cocoa powder, releasing its full flavor potential and creating chemical reactions with the baking soda that help the cake rise. This technique is used in many simple chocolate cake recipes for guaranteed moistness. The hot liquid also gelatinizes some of the starch in the flour, which contributes to the tender texture of the finished cake.
5-Fifth Step: Baking Your Cake LayersOnce your batter is smooth, divide it evenly between your two prepared cake pans. You can use a kitchen scale for precision or simply eyeball it by pouring slowly back and forth between the pans. Place both pans in the center of your preheated oven, leaving a little space between them for air circulation. Bake for 30 to 35 minutes. The cake is done when the edges have started to pull slightly away from the sides of the pan, and a toothpick inserted into the center comes out clean or with just a few moist crumbs clinging to it. Avoid opening the oven door too early, as this can cause the cake to fall. If your oven has hot spots, rotate the pans halfway through the baking time for even results. The tops should spring back lightly when touched with your finger when they’re fully baked.
6-Sixth Step: Cooling the CakesProper cooling is essential for a successful cake. Remove the pans from the oven and set them on a wire rack. Let the cakes cool in the pans for exactly 10 minutes no longer, or they may begin to steam and become soggy. After this brief cooling period, run a thin knife around the edges of each pan to loosen the cakes. Place a wire rack on top of each pan and carefully invert to release the cake. Gently tap the bottom of the pan if needed to help the cake release. Peel off the parchment paper if you used it, then let the cakes cool completely on the wire racks. This usually takes about 1 to 2 hours depending on your kitchen temperature. The cakes must be completely cool before frosting, or the frosting will melt and slide off. You can speed up this process by placing the wire racks in the refrigerator for 20-30 minutes, but avoid freezing them at this stage.
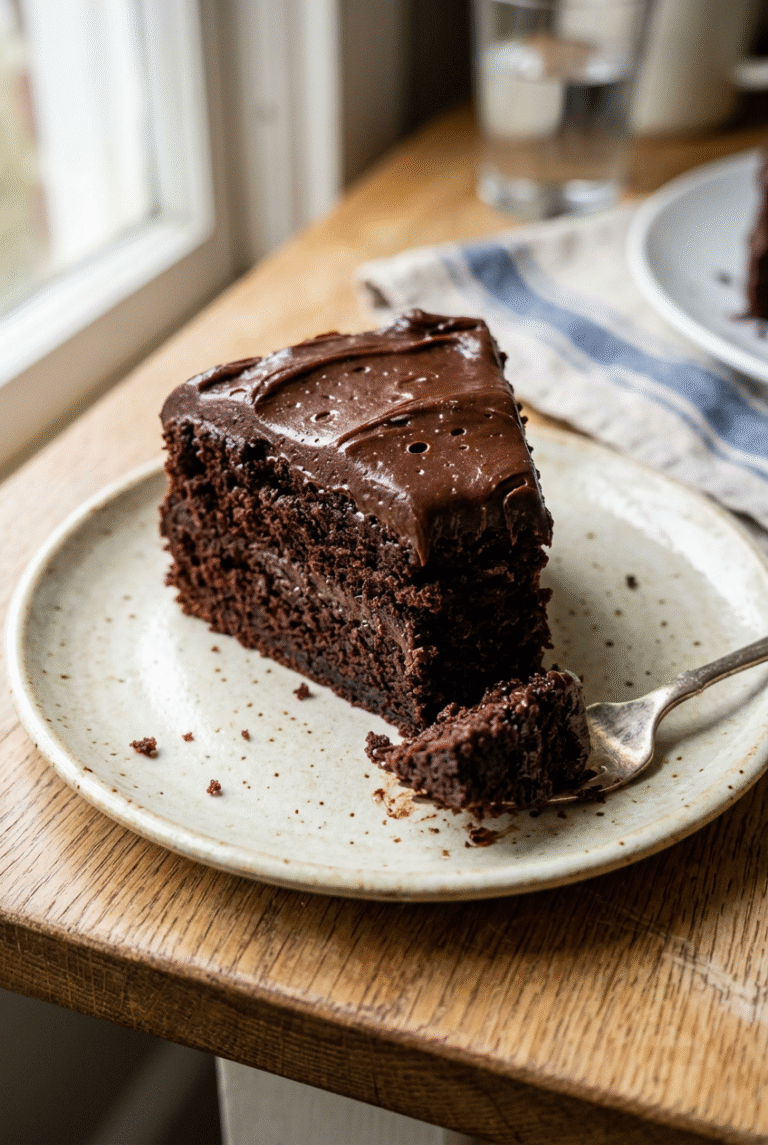
7-Final Step: Frosting and ServingOnce your cakes are completely cool, you’re ready to assemble and frost them. Place one cake layer on your serving plate or cake stand. Spread your desired frosting over the top chocolate buttercream is the classic choice, but cream cheese frosting, whipped ganache, or even a simple dusting of powdered sugar all work beautifully. Place the second cake layer on top, then frost the top and sides of the entire cake. For the smoothest finish, apply a thin “crumb coat” of frosting first, chill briefly, then apply the final layer of frosting. Decorate as desired with chocolate shavings, sprinkles, fresh berries, or simply leave it elegantly plain. Serve at room temperature for the best flavor and texture. This cake actually improves slightly after sitting for a day, allowing the flavors to meld, so it’s perfect for making ahead of time for special occasions.
Last Step:
Please leave a rating and comment letting us know how you liked this recipe! This helps our business to thrive and continue providing free, high-quality recipes for you.Notes
💧 Embrace the thin batter after adding boiling water – it’s the secret to an ultra-moist cake!
☕ Espresso powder boosts chocolate flavor without tasting like coffee; omit if you don’t have it.
🧁 Go gluten-free by using a 1:1 gluten-free flour substitute for the all-purpose flour.
- Prep Time: 15 minutes
- Cook Time: 30 minutes
- Category: Dessert
- Method: Baking
- Cuisine: American
- Diet: Vegetarian
Nutrition
- Serving Size: 1 slice
- Calories: 124
- Fat: 1g
- Carbohydrates: 27g
- Fiber: 1g
- Protein: 3g